EasyApache (aka EA4) 4 is the ultimate PHP and Apache management tool for cPanel servers. EasyApache 3 becomes a dinosaur from the prehistoric age against the new and fast EA4. On this post we will teach you how to configure EasyApache 4.
EA4 is one of those things that make you proud of using cPanel as your control panel, compared with the old slow EA3 that had to built everything manually by compiling programs, EA4 uses its own RPMs and makes the install and uninstall process of PHP/Apache really easy, and it completes within just a few seconds.
Let’s see how you can configure EasyApache 4 to add your desired PHP and Apache modules.
Configure EasyApache 4 Step by Step
The first thing we have to understand is the fact that EA4 must be used from the WHM, instead of EA3 that was easy to use from the Linux shell. cPanel front end engineers and UX team have done a really good job while making this interface super user friendly for you.
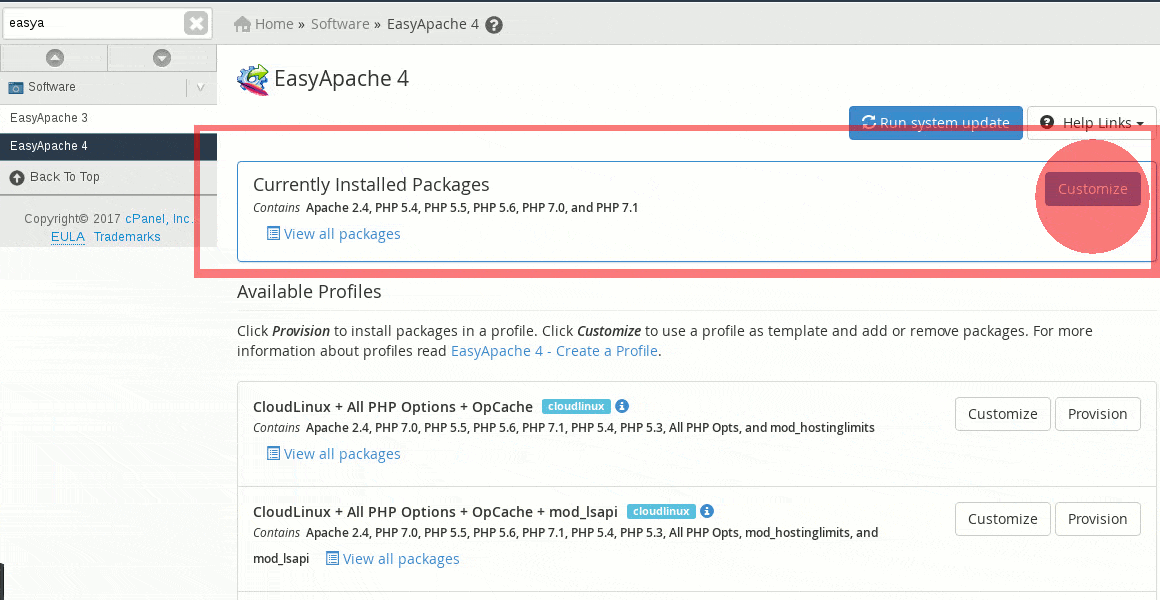
Let’s start using EA4 by moving to WHM > EasyApache 4
Click on ‘Customize’ button at your left, as you see below:
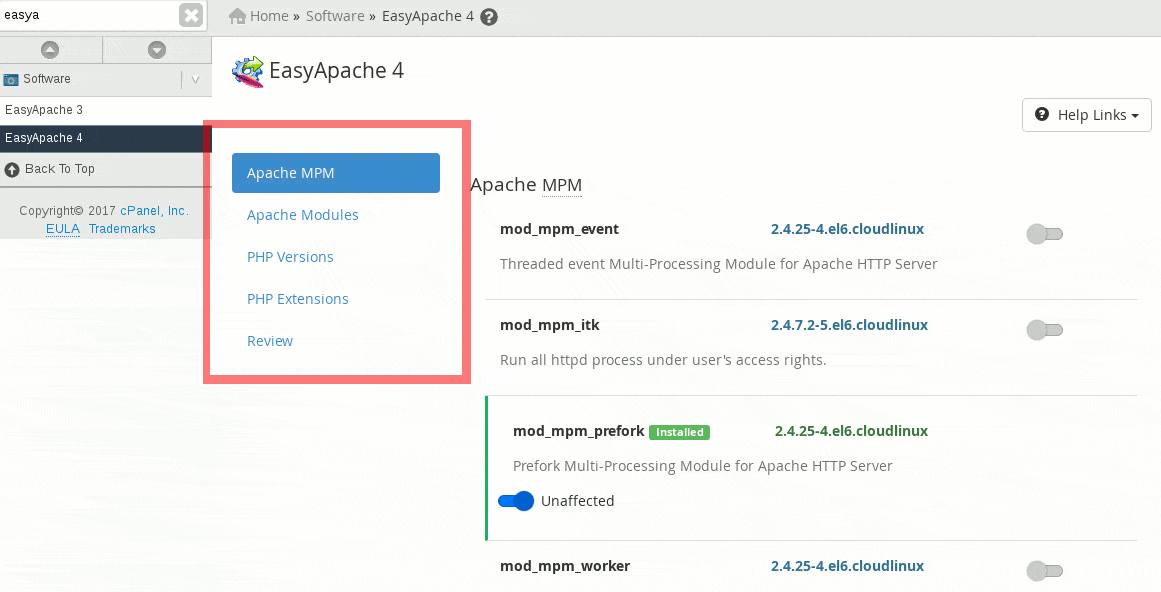
Now, take a look at the left side menu, you will see a few items that you can click on: Apache MPM, Apache Modules, PHP versions and PHP extensions. In my case I don’t need to change anything from the Apache MPM, but you can change the mpm if you don’t like the default one that is mod_prefork.
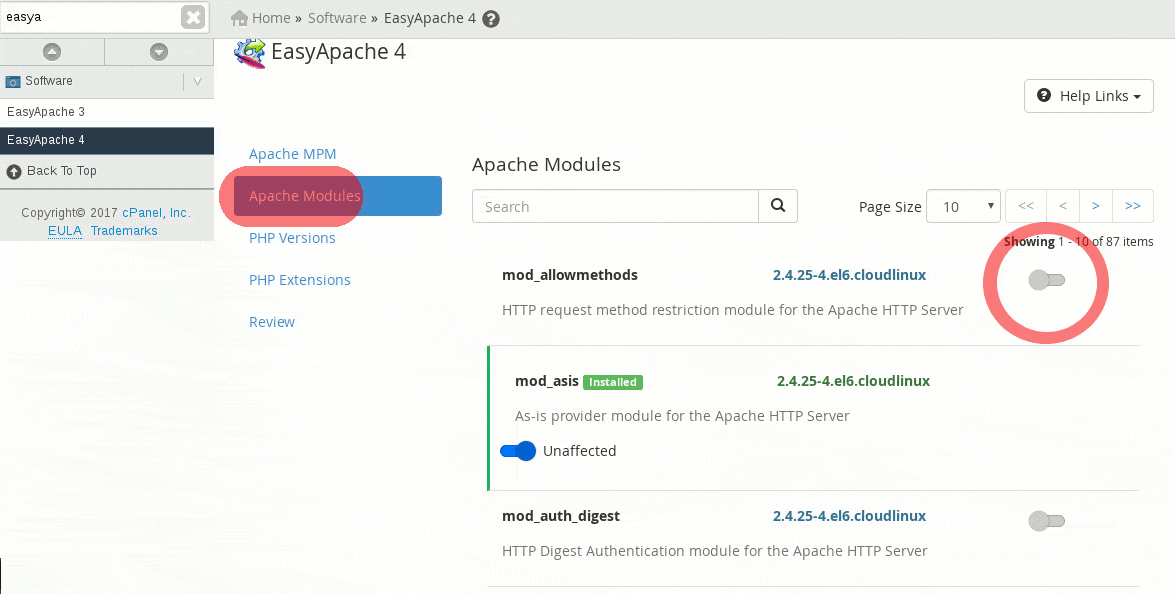
Now, let’s move to the Apache Modules section.
From this part, you will be able to select the most used Apache modules for your web apps. Just click on the right grey box to activate a module, once it becomes blue, then the module has been successfully selected.
You will also be able to search for modules you already know using the search box from the top.
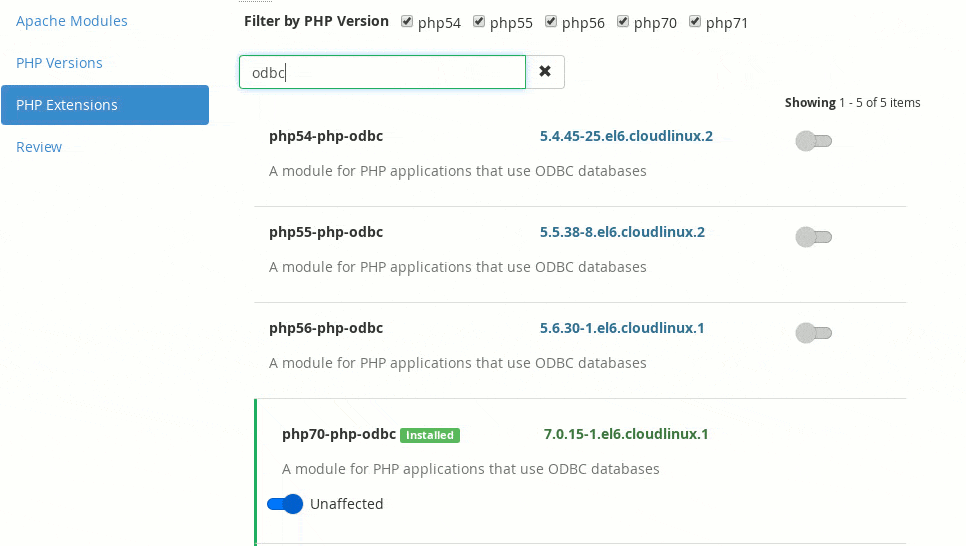
Now we move to the fun part, let’s select the PHP Extensions we need from EA4. Use the same procedure as before, activate your desired php extensions until they become blue.
Important: when you select a PHP extension, make sure you selected the right one for your PHP version, as EA4 includes multiple php extensions for each PHP version from 5.5.x to 7.x. In the example below ODBC was selected for PHP 7.0 but not for PHP 5..5.x.
How can I uninstall modules from EasyApache 4?
In order to uninstall modules or extensions from EA4, you will have to do the same process, and click on the blue color box, until it turns to grey.
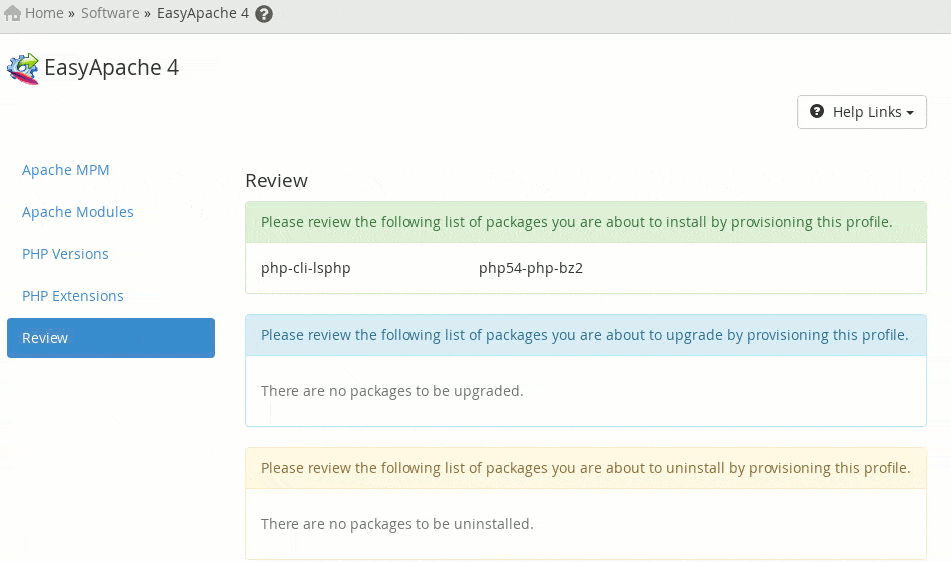
Once you are ready to proceed with your new Apache and PHP Build, you can click on “Review” at your left side, from this point you will be able to review your EA4 install/uninstall selected options and give you instructions in case it detects that any package can be affected by the selected options.
You are ready to configure EasyApache 4 without any problems, to finish the process and begin the installation just click on ‘Provision’ button.
What’s your experience working and configuring Apache/PHP packages using EasyApache 4? Please share your thoughts with us.

